
Tourist Photos and Memories: How Photos Become Part of the Travel Experience
Tourist Photos and Memories: How Photos Become Part of the Travel Experience
Imagine you’ve just returned from the trip of a lifetime to the Maldives, or wrapped up an exploration of the charming streets of Paris. You open your phone to display the pictures on the TV screen for your family, only to find that the photos load slowly, or some are unclear, or the app you’re using keeps crashing. Does this scenario sound familiar?
The truth is, a large part of the enjoyment that follows a trip depends on how you handle the travel photos you’ve taken. It’s not just about beautiful shots, but also about how you save, share, and even upload them to travel booking sites or your personal blog.
If you’re not mindful of these details, your memories might turn into a source of frustration rather than a beautiful story to tell. But don’t worry—this article will guide you through simple and practical steps to transform your travel photos into a seamless and stunning experience, with a focus on optimizing, compressing, and converting formats to make them look their best on any platform.
Why Image Optimization is Important for Travelers?
Before we dive into the solutions, let’s talk frankly about the problems you might face if you neglect your travel photos.
Nightmare #1: Slow Load Times and Display Issues 🐌
In 2026, no one waits around. If you’re running a travel blog, or just sharing an album via WhatsApp or email, large image files (like 5 or 10 MB per photo) will result in painfully slow load times. Not only does this annoy your friends, but it also severely impacts your website’s Google ranking if you’re using these images for travel content.
Nightmare #2: Rejection from Travel and Booking Platforms ✈️
Have you ever tried uploading a photo of a hotel room or tourist attraction to a booking site, only to get a message saying “File size too large” or “Unsupported format”? Big travel sites like Booking.com, Airbnb, or SEO-focused tourism platforms have strict image requirements. Failing to meet these standards could cost you a booking or visibility in search results.
Nightmare #3: Storage and Cloud Consumption 📱
High-resolution travel photos quickly eat up space on your phone. Many of us have stopped taking photos mid-trip because we get a “Storage Full” message. Then we have to delete apps or old photos—definitely not ideal for an enthusiastic traveler.
Bottom Line: Neglecting your photo files puts your memories at risk or compromises their quality. The good news is, solutions are within reach and simpler than you think.
Practical Tips to Transform Travel Photos (No Technical Expertise Needed)
Fortunately, we no longer need complex programs like Photoshop to solve these issues. There are quick and easy solutions that anyone can apply. The goal is to make your photos faster, lighter, and more beautiful.
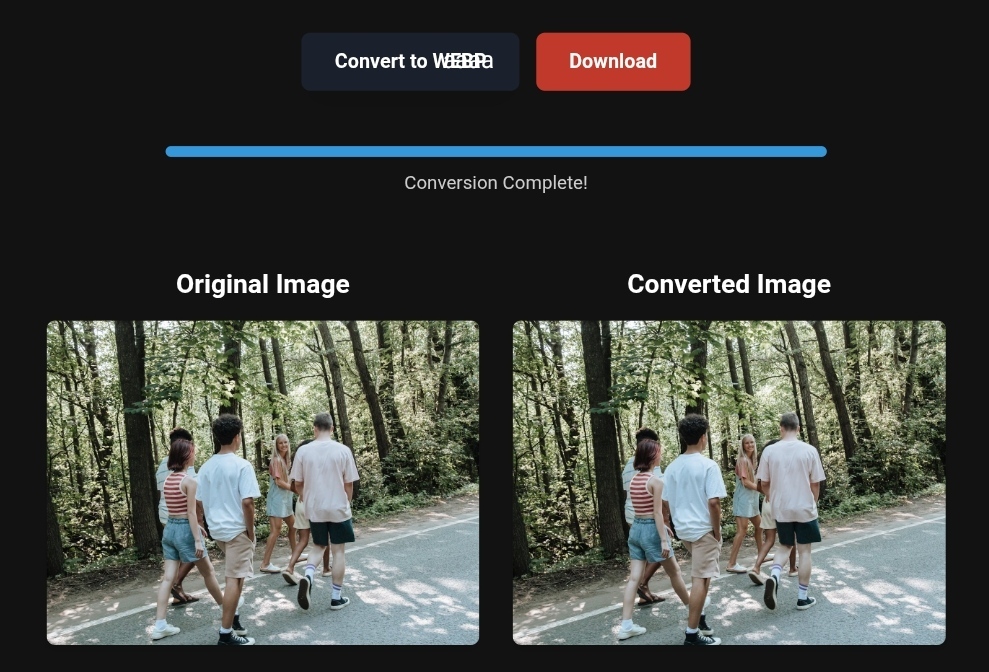
1. Convert PNG to WebP: The Key for Modern Travel Websites
If you upload photos online (for a blog, store, or hotel website), the PNG format can be a disaster in terms of file size. WebP is a modern alternative developed by Google that reduces file sizes by up to 85% without compromising visible quality.
The Problem Without This Step: Your website will load incredibly slowly (leading to a higher “bounce rate”), and you won’t have a chance to appear on Google’s first pages due to poor “Page Experience.”
The Solution:
Use an online PNG-to-WebP converter tool. Just upload your images (up to 100 at a time) and click “Convert.” In seconds, you’ll have lightweight, high-quality images with full transparency support.
Pro Tip: If you’re using WordPress or a similar platform, search for a plugin that automatically converts images to WebP when uploaded. This will save you tons of effort.
2. Compress Travel Photos: Balance Quality and Speed
You don’t need a 10 MB image to share it on Instagram or Facebook. Screens don’t require ultra-high resolution, and the difference between a well-compressed and non-compressed image is practically invisible.
The Problem Without This Step: You won’t be able to share your travel albums easily, and you’ll quickly drain your phone’s data plan or the hotel Wi-Fi.
The Solution:
Use image compression websites like TinyImg or Squoosh. These tools work directly in the browser and don’t require uploading to external servers (for total privacy). Just drag and drop your image into the box, and you’ll see the result immediately: 70% smaller file size with almost the same quality.
3. Convert WebP to PNG: What if You Face Compatibility Issues?
Sometimes you may need to edit a photo in an old program that doesn’t support WebP. Or you want to print the photo in a store that doesn’t accept this modern format. You might find yourself unable to open the image.
The Solution:
Tools like Canva or CloudConvert offer a free WebP-to-PNG converter. This process restores the image to a widely compatible format with all devices and applications, maintaining transparent backgrounds. Pro Tip: After converting, you can compress the resulting PNG using the previous tools to reduce its size.
Before and After – The Real Impact of Image Optimization
Let’s take a practical look at the difference these small steps can make:
| Metric | Before Optimization (PNG – Uncompressed) | After Optimization (WebP – Compressed) |
|---|---|---|
| File Size | 1.2 MB | 180 KB (6x smaller) |
| Load Time | 3-5 seconds | Less than 1 second |
| Compatibility | Might be slow on older phones | Smooth on all modern devices |
| Image Quality | High | Excellent (no visible difference) |
| SEO Result | Poor Google ranking | Significant improvement in Core Web Vitals |
Important Note: Image optimization isn’t just a luxury; it’s a critical factor for search engine ranking (SEO) in 2026.
Step-by-Step Guide to Transform Your Photos (Even If You’re a Beginner)
Step 1: Collect Your Photos
Place all your trip photos in one folder on your desktop.
Step 2: Bulk Compression
- Go to a website like TinyImg or ToolloopAI (a platform specializing in this area).
- Drag the entire folder into the website’s interface (or select the files).
- Wait a moment, then download the compressed files (they’ll usually be in a ZIP format).
Step 3: Convert to WebP (For Websites and Blogs)
- Use a tool like “PNG to WebP Converter” from imagecompressorconverter.com.
- Upload your freshly compressed images.
- Click “Convert,” then “Download.”
Now your photos are ready to upload to the web or share with loved ones in just seconds.
What Image Conversion Tools Can’t Do (Avoid These Mistakes)
Although these free tools are fantastic, they do have limitations that you should be aware of:
- Complete Privacy Isn’t Always Guaranteed: Some tools upload your images to their servers. If your photos are highly sensitive (like travel documents or IDs), make sure to use a tool that works “locally” in the browser (client-side), such as Squoosh or TinyImg.
- They Can’t “Invent” Missing Details: A compression tool won’t make a blurry or poorly-lit photo look professional. Before compressing, use simple editing apps like Remini or Let’s Enhance (which use AI to improve quality) if the original image is poor.
- Certain Official Platforms Might Not Accept Them: If you need a passport photo, for example, don’t use regular compression tools, as they may alter the required dimensions. There are dedicated apps like Documentus or Passport Photo Editor that maintain the correct proportions and measurements.
Based on the precise data provided, we can define the ideal criteria for selecting the best companies that meet travelers’ needs. The goal is not merely to choose an ordinary service, but to find one that ensures a safe, comfortable, and hassle-free journey.
✅Related Technology: High-Quality Image Capture
If you’re working on digitizing old photos or creating digital assets from film negatives, starting with high-quality scans ensures your final optimized images retain maximum detail.
👉 Check the 22MP Slide Scanner on AliExpress: https://s.click.aliexpress.com/e/_c4VFbg55
✅Are you ready to take your business to the next level? Whether you’re an entrepreneur, small business owner, or digital marketer, there are smart tools that can turn your ideas into real profits!
By integrating high-quality images with a reliable platform like Spocket, you can transform your dropshipping store into a premium shopping experience, increasing your chances of real profits. Don’t waste time searching for complicated solutions—try Spocket now and start offering professional images for your products to ensure your success!
👉 Check supplier requirements on Spocket: https://get.spocket.co/e8z1port3g11
✅Embark on Your Next Adventure with Viator and Start an Unforgettable Journey
Enjoy exceptional travel experiences with Viator, the perfect platform for discovering tours, activities, and adventures around the world. Whether you’re looking for a private tour in new york or an enriching cultural experience, Viator offers everything you need, complete with high-quality images and detailed information to help you savor every aspect of your adventure. With Viator, your dream destinations are just a step away—start your journey now and create memories that will last a: https://www.viator.com/New-York-City/d687-ttd?pid=P00293733&mcid=42383&medium=link
Products are chosen independently by us. Purchases made through our links may earn us a commission at no additional cost to you.
FAQ About Travel Photo Optimization
Q: Does compressing photos affect their print quality?
A: Yes, if you plan to print a large photo (like a poster or wall art), it’s better to keep an uncompressed PNG version. However, for digital use or small prints (A4 or less), proper compression (like 80% quality in WebP or JPG) works perfectly fine.
Q: What’s the best image format for travel and booking websites?
A: Without a doubt, WebP. It’s become the golden standard for 2026 because it offers high quality and small file sizes, enhancing user experience and helping your site rank better on search engines.
Q: What if my photo has a distracting background?
A: You can use AI-powered background removal tools (like Remove.bg) before compressing the image. Once removed, save it as PNG (to retain transparency), then convert it to WebP if you need to upload it online.
R Hallou
SEO and Image Optimization Expert
Writer for ToolloopAI, a platform specialized in generating and optimizing images using AI for websites and anyone looking for high-quality images for various activities. R Hallou has hands-on experience in combining SEO techniques with visual content to ensure the fastest user experience and highest-quality content.
www.toolloopai.com
One Comment